
Open the Courses page
From your admin dashboard, click Courses in the main sidebar. You will see a grid of cards showing every course with its name, enrollment count, and status.
A course is a fixed series of sessions that customers enroll in as a whole — for example, a six-week beginner yoga series or a summer intensive. Unlike a class, which customers book session by session, enrolling in a course signs the customer up for the entire program.
Each card shows how many spots are taken (for example, 3 / 12 Reserved) and a status such as Available, Full, or Enrollment closed.
Start creating a course
Click Add Course in the top-right corner. A form panel slides open with two sections: Basic Settings and Pricing.
Enter a course name and an optional description. The description supports rich formatting, so you can add headings, bullet points, and links. This text appears on the customer booking portal, so explain what the course covers, who it is for, and what customers should bring.
Set the Capacity. This is the maximum number of customers who can enroll in the whole course, shared across all of its sessions.
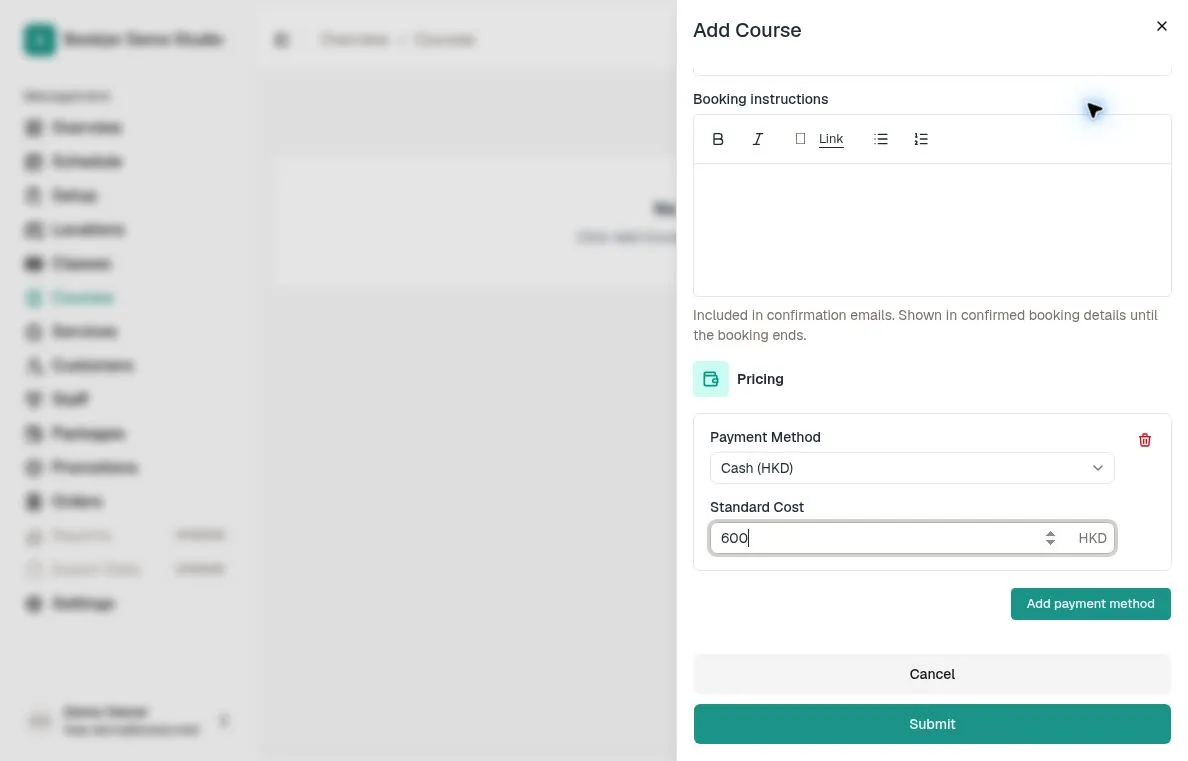
Use Booking instructions for arrival or preparation notes sent in confirmation emails and shown in confirmed booking details until the booking ends.
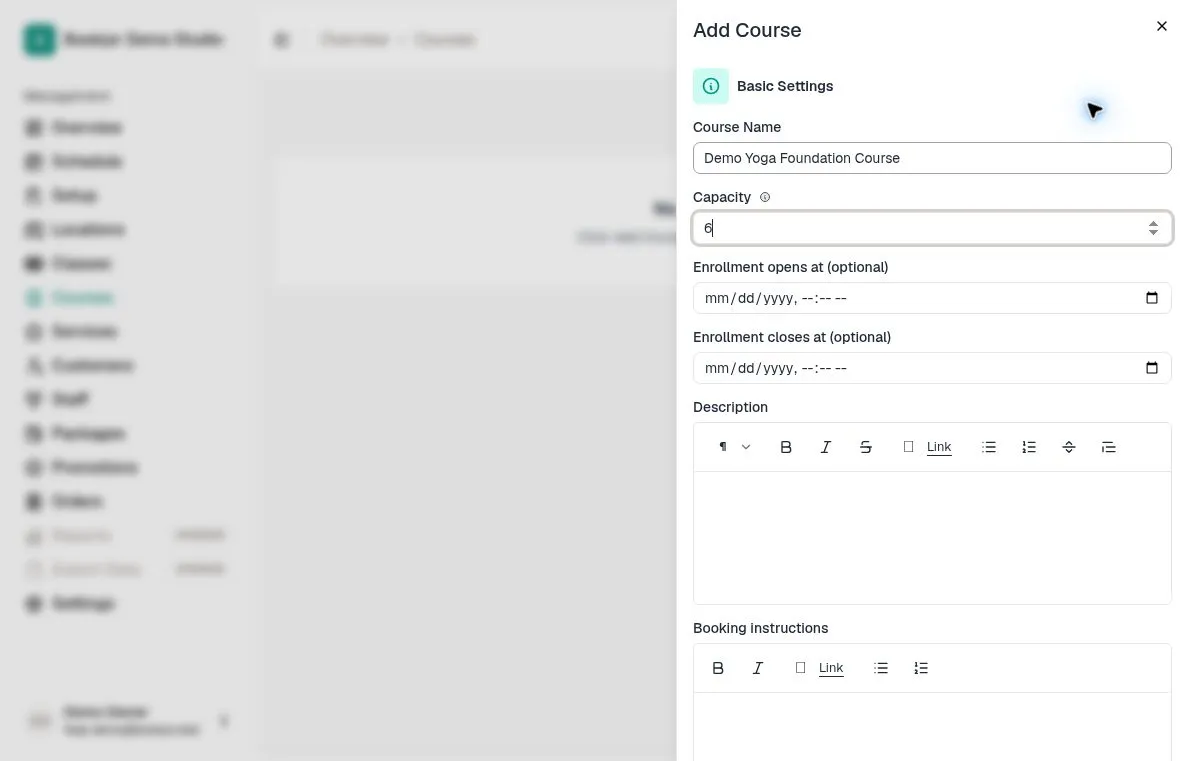
Set the enrollment window (optional)
Use Enrollment opens at (optional) to control when customers can begin enrolling, and Enrollment closes at (optional) to stop customer enrollment at a specific date and time. The closing time cannot be earlier than the opening time.
Leave a boundary blank if you do not need it. The public portal also checks course status and capacity. Staff can enroll outside this window from the admin, but cannot bypass a full, canceled, or finished course.
Configure pricing
In the Pricing section, add at least one payment method. Choose Cash, a credit package, or a pass package. Enter the Standard Cost for cash and credit packages; pass packages cover the whole course while active, so their cost stays at zero.
The cost covers the entire course — all sessions included — not a single session. Add multiple payment methods to offer a one-time cash price, a package credit redemption, or access through an active pass.
Add sessions to the course
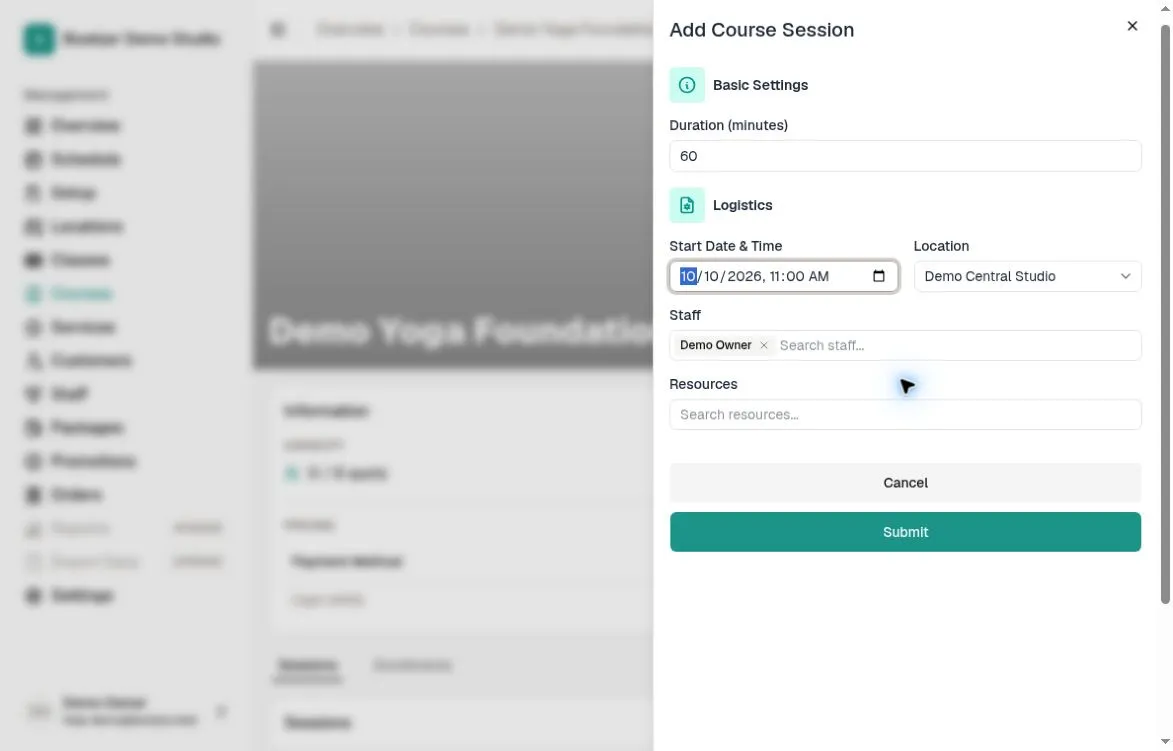
Click Submit to save the course, then open it from the Courses grid to reach the course detail page. Click Add Session to schedule each meeting of the course.
For every session, set the Duration and Start Date & Time, then choose the Location, the Staff members teaching it, and the Resources (rooms or equipment spaces) it needs. Customers who enroll in the course are automatically booked into every session you add.
Repeat for each meeting of the program. A six-week course, for example, typically has six sessions. Every session appears in the Sessions table with its start time, staff, location, and status.
Enroll customers
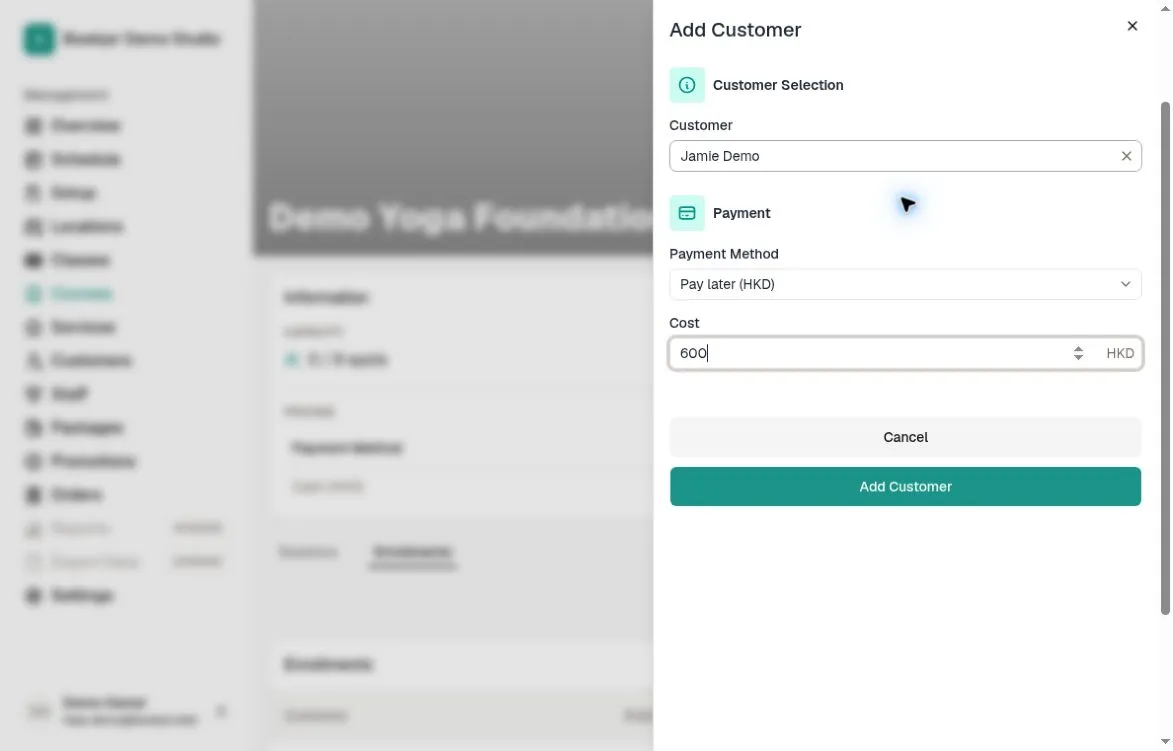
Open Enrollments and click Add Customer. Search by display name and select the customer. Create a profile in Customers first if needed.
Choose Free, Pay Later, Offline collection, or Package. Enter the amount due for Pay Later; select Offline collection only after you have collected the full amount outside Bookjor, then enter Amount collected. For a credit package, select an active package and enter the credits to deduct within its combined balance. For a pass, no credit amount is required.
Click Add Customer. A successful manual enrollment reserves a place and includes the course sessions that have not started; past sessions are not added retrospectively. Newly added sessions also include active enrollments.
Edit, cancel, or make changes later
Click Edit Course to change its details, enrollment window, booking instructions, or pricing. New pricing does not rewrite existing orders.
To cancel one meeting, open it from Sessions, then select More Options > Cancel Session. To cancel one customer’s enrollment, use Cancel in Enrollments. These dialogs offer optional fixed credit-package compensation; they do not use the whole-course payment-specific refund controls.
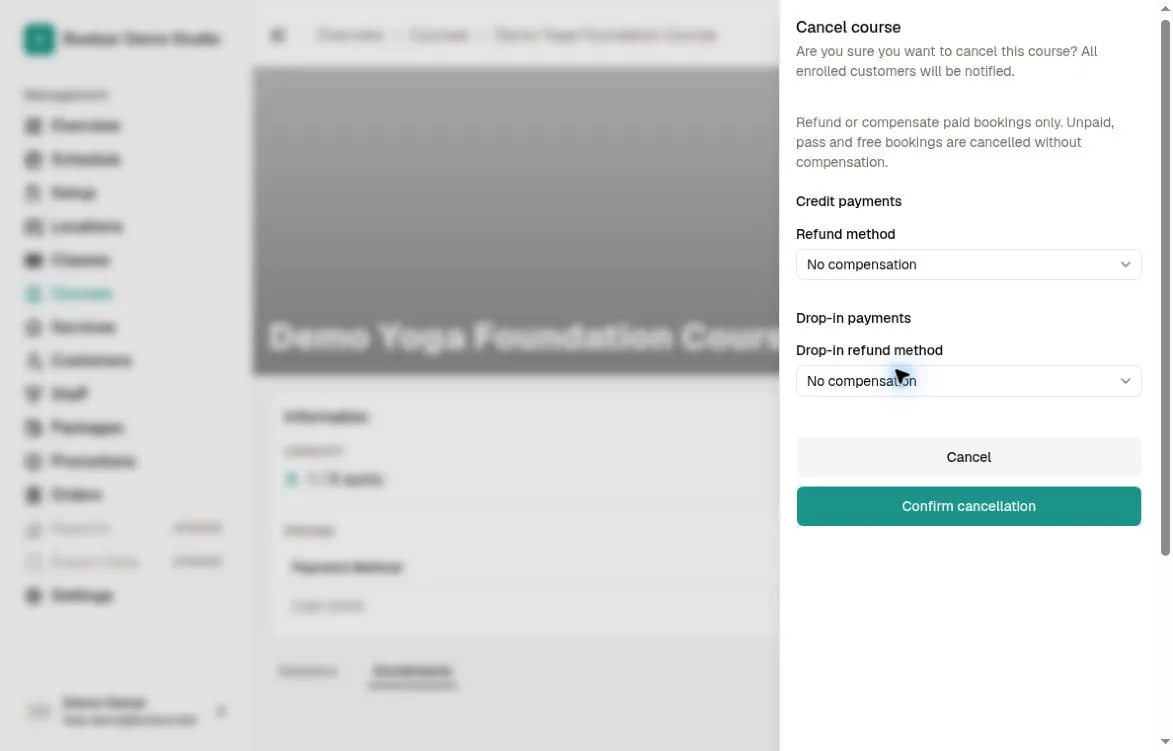
To cancel the whole course, choose More Options > Cancel course. Choose separately for Credit payments and Drop-in payments: no compensation or configured credits, with Return original credits additionally available for credit payments. Original-credit return refunds the full course credits even if sessions have already been held, preserves original expiry and sharing, and does not remove earlier session compensation.
Only eligible successful positive payments receive whole-course compensation. Unpaid, free, zero-amount and pass enrollments receive none. Configured credits are a package credit grant, not a money refund. Check both choices before confirming the permanent cancellation.
Finish a completed course
After the end time of every course session has passed, More Options offers Finish course. Review the confirmation before selecting Confirm finish. The course must have at least one session.
Finishing is permanent and stops further enrollment and course changes. Use it when the program is complete; reschedule individual meetings if the program is still running.