
Open provider settings
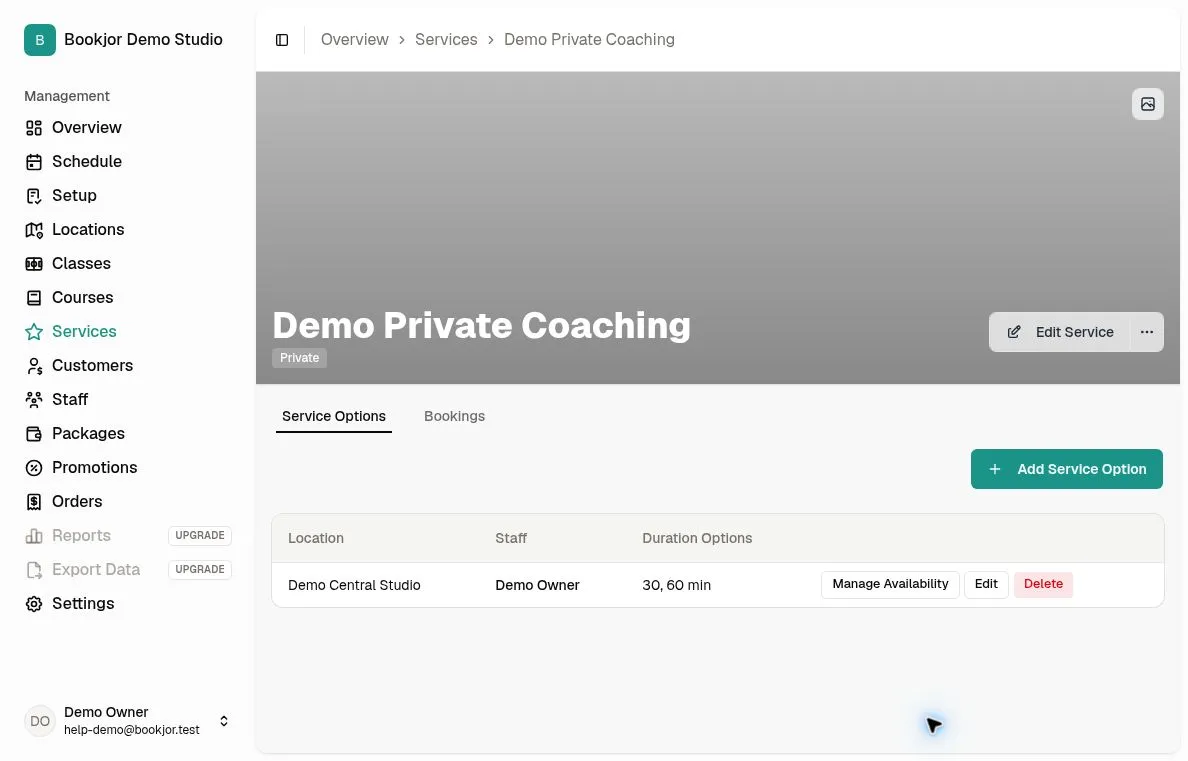
Navigate to the service detail page, switch to the Service Options tab, and find the provider you want to configure.
Click Manage Availability to open the weekly schedule grid.
Saving changes requires the Manage services permission. Without it, availability can be opened read-only.
Add standard and peak availability slots
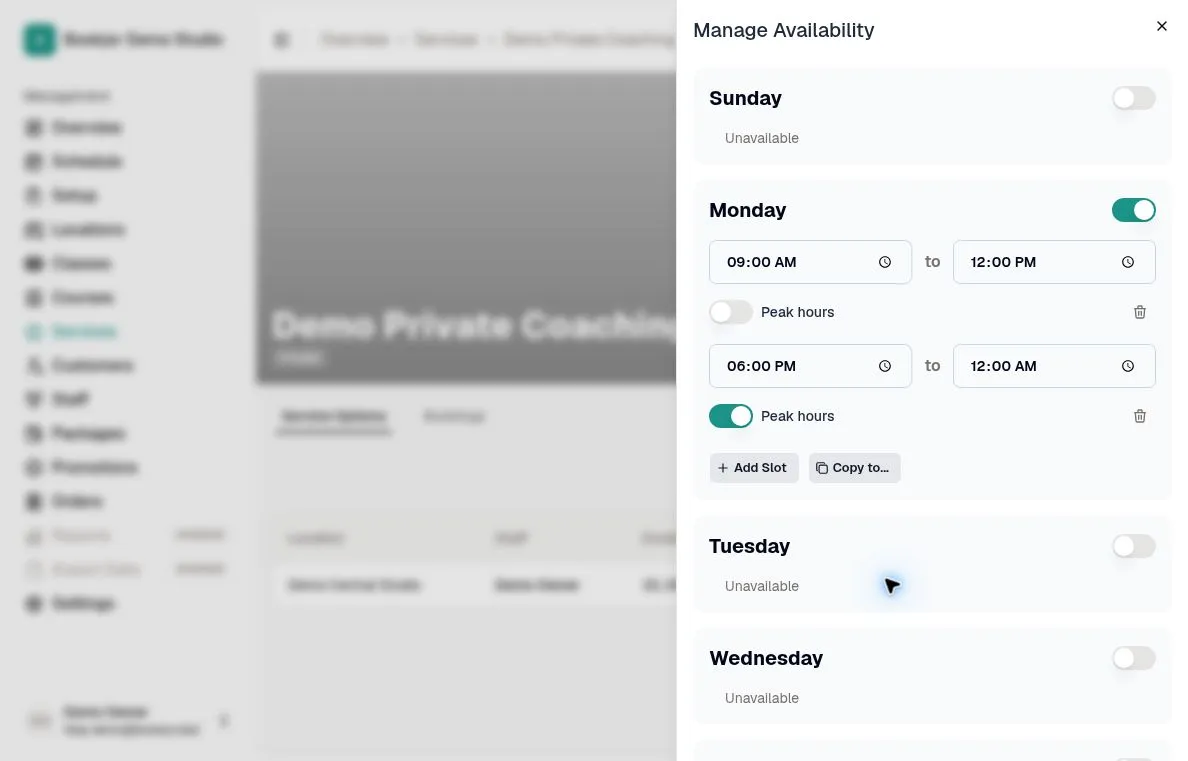
Turn on each available day, click Add Slot, and enter a start and end time in the studio’s time zone. Add separate non-overlapping slots for breaks, such as 09:00–12:00 and 14:00–18:00.
An end time of 00:00 means midnight at the end of that day. For hours crossing midnight, split them between the two days. Copy to... > Clone replaces the selected days with the source day’s slots, including peak flags.
Mark a slot as Peak hours to use the service option’s optional peak price when any part of a booking overlaps that slot. If no peak price is configured, the regular price is used.
Save and preview
Click Save Changes. Open your public booking portal and check that the provider's available slots appear correctly.
Make a test booking to verify the start time, duration, and calendar blocking all work as expected.
Check each offered duration. Existing bookings, class sessions, staff unavailable time, and the advance-booking window can remove otherwise available slots. Turning off a day removes its availability when you save.