Open the promotion form
Click Promotions in the sidebar, then click Add Promotion. The form opens beside the promotion list.
Name the promotion and choose its mode
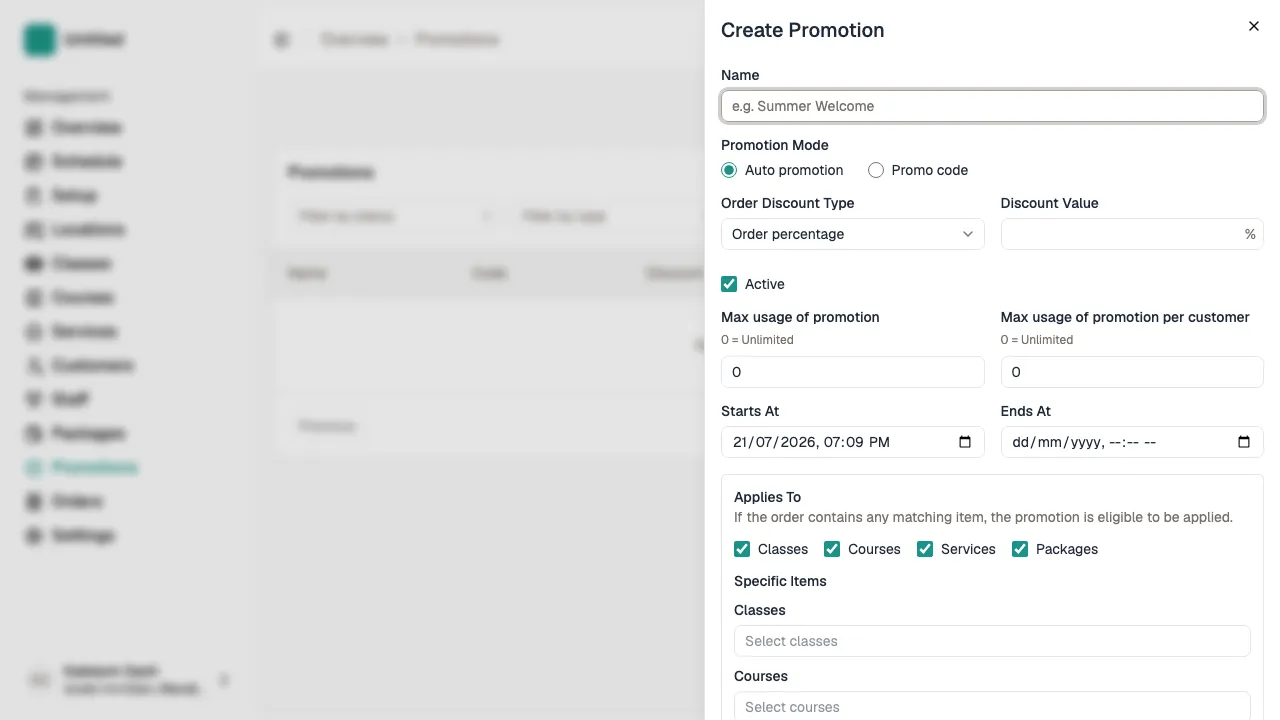
Enter the customer-facing Name, then choose Auto Promotion or Promo Code under Promotion Mode.
An auto promotion applies at checkout whenever the order meets its conditions. A promo code also requires a Promo Code that the customer enters at checkout.
Tip Use a clear display name such as “Summer class discount.” For a code-based campaign, use a short code such as “SUMMER20.” Codes are case-sensitive.
Set the discount
Under Order Discount Type, choose Order percentage or Order fixed amount.
Enter only the number in Discount Value. Percentage discounts must be greater than 0 and no more than 100; fixed discounts use your studio currency.
Set the active period
Leave Active on to make the promotion available during its schedule. Turn it off to save the promotion without applying it at checkout.
Starts At is required. Ends At is optional; leave it blank to keep the promotion available until you turn it off.
Choose the eligible item types
Under Applies To, keep at least one item type selected: Classes, Services, Packages, or Courses.
Only matching order items receive the discount. Classes are scheduled group sessions, Services are private appointments, Courses are multi-session programs, and Packages include credit packages and passes.
Optionally restrict specific items
Under Specific Items, search for and select the individual items that should qualify.
Leave a selector empty to include every item of that enabled type, including items you create later.
Tip Select specific items only when the promotion should exclude other items of the same type.
Set usage limits
Max usage of promotion limits total redemptions across all customers. Max usage of promotion per customer limits redemptions by one customer.
Enter 0 for either field to leave that limit unlimited.
Submit and verify
Click Submit. Open the new promotion from the list and confirm its code, discount, active period, eligibility, and limits.
Test it with a small customer order. The promotion detail page also lets you edit the promotion, review redemptions, and add translations.